通化 网站建设深圳全网推广
文章目录
- 一. 关于Bean作用域的实例
- 1. lombok
- 2. 实例代码
- 二. 作用域定义
- 1. Bean的六种作用域
- 2. 设置作用域
- 三. Spring 执行流程和 Bean 的生命周期
- 1. Spring 执行流程
- 2. Bean生命周期
一. 关于Bean作用域的实例
注意在此例子中需要用到lombok
1. lombok
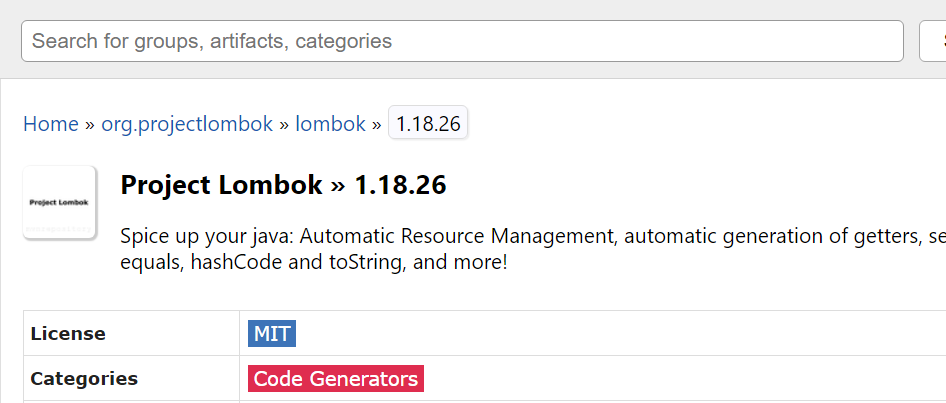
lombok是什么?
Lombok 是一个 Java 库,它通过注解的方式来简化 Java 代码的编写。它提供了一组注解,让我们可以通过在代码中添加这些注解来自动生成样板式的代码,如 getter、setter、构造函数、toString 等。
使用 Lombok 可以有效地减少冗余的样板代码,提高代码的可读性和开发效率。不需要手动编写大量的 getter 和 setter 方法,也不需要重复编写 equals、hashCode 和 toString 方法等。通过简单地添加几个注解,Lombok 会在编译时自动生成这些常见的方法和实现。
lombok的使用:
- 在框架中添加
lombok依赖.

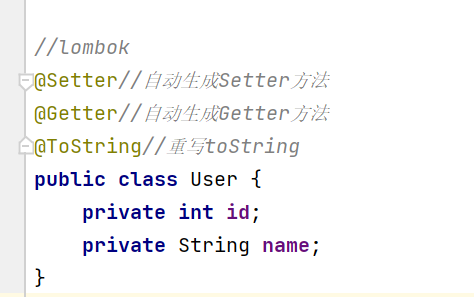
- 在实体类上使用
lombok提供的注解.
- 安装
lombok插件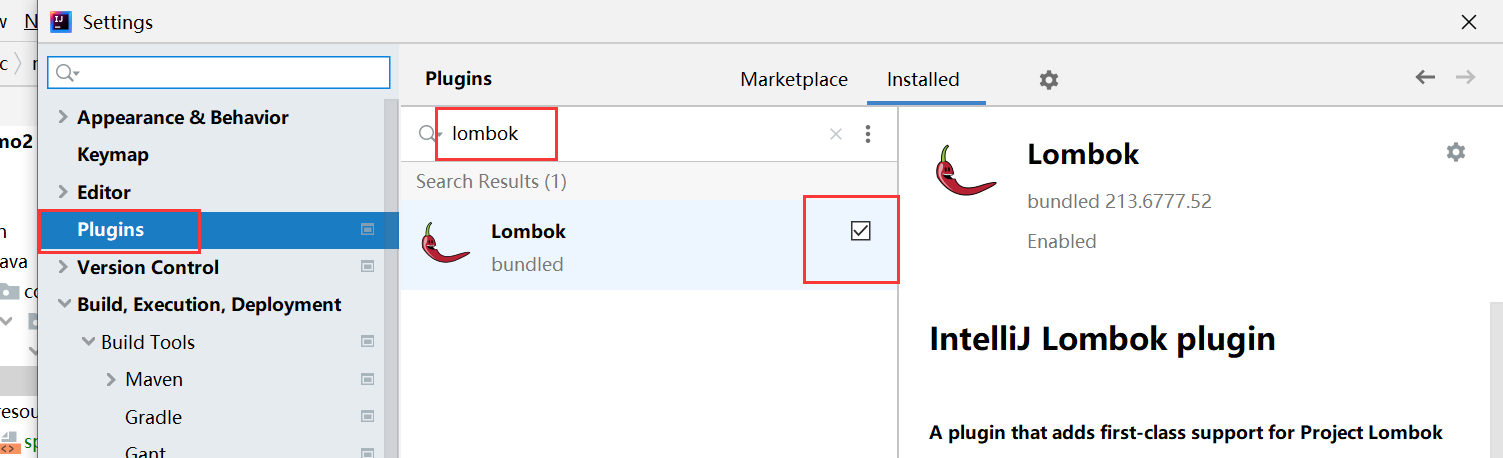
2. 实例代码
Users:
package com.java.demo.enity;import org.springframework.context.annotation.Bean;
import org.springframework.stereotype.Controller;@Controller
public class Users {@Beanpublic User user1(){User user = new User();user.setId(1);user.setName("xxxflower");return user;}
}UserControlle:
package com.java.demo.controller;import com.java.demo.enity.User;
import org.springframework.stereotype.Controller;import javax.annotation.Resource;@Controller
public class UserController {@Resourceprivate User user1;public User UserPrint1() {User user = user1;System.out.println("Bean 原 Name:" + user.getName());user.setName("且听风吟"); // 进⾏了修改操作System.out.println("UserController 修改后 Name: "+user.getName());return user;}
}UserController2:
package com.java.demo.controller;import com.java.demo.enity.User;
import org.springframework.beans.factory.annotation.Autowired;
import org.springframework.stereotype.Controller;@Controller
public class UserController2 {@Autowiredprivate User user1;public User UserPrint2() {User user = user1;System.out.println(user.toString());return user;}
}App:
package com.java.demo;import com.java.demo.controller.UserController;
import com.java.demo.controller.UserController2;
import org.springframework.context.ApplicationContext;
import org.springframework.context.support.ClassPathXmlApplicationContext;
import org.springframework.stereotype.Controller;@Controller
public class App {public static void main(String[] args) {ApplicationContext context =new ClassPathXmlApplicationContext("spring-config.xml");UserController userController = context.getBean("userController",UserController.class);System.out.println(userController.UserPrint1());UserController2 userController2 = context.getBean("userController2",UserController2.class);System.out.println(userController2.UserPrint2());}
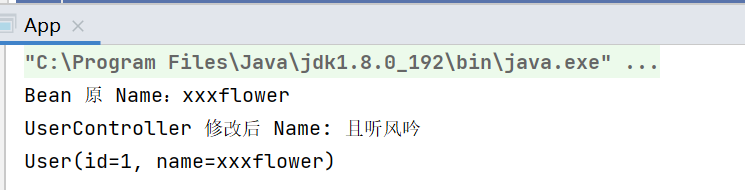
}代码预计运行结果:

代码实际运行结果:
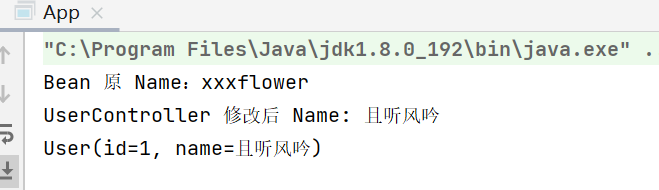
我们可以看到上述第三行代码和我们预计的结果不符,这是为什么呢?
以上问题的原因是Bean默认情况下采用的是单例状态.(singleton),也就是所有的人使用的都是同一个Bean对象.在我们之前学习过的单例模式中,采用单例模式可以很大程度上提高性能,所以在Spring中Bean的作用域默认也是 singleton 单例模式.
二. 作用域定义
限定程序中变量的可⽤范围叫做作⽤域,或者说在源代码中定义变量的某个区域就叫做作⽤域。
而 Bean 的作用域是指 Bean 在 Spring 整个框架中的某种⾏为模式.比如 singleton 单例作⽤域,就表示 Bean 在整个 Spring 中只有⼀份,它是全局共享的,那么当其他⼈修改了这个值之后,那么另⼀个⼈读取到的就是被修改的值。
1. Bean的六种作用域
Spring 容器在初始化⼀个 Bean 的实例时,同时会指定该实例的作⽤域。Spring有 6 种作⽤域,最后四种是基于 Spring MVC ⽣效的:
- 单例模式:
singleton(默认模式) -> 性能的考虑 - 原型模式:
prototype - 请求作用域:
request,每次 HTTP请求,都会创建一个Bean对象。【适用于Spring MVC/Spring Web】 - 会话作用域:
session,每次Session会话共享一个Bean。【Spring MVC】 - 全局作用域:
application,一个http servlet context 中共享一个bean。【Spring MVC】 webscoket: 网络长连接,只适用于Spring WebSocket 项目。
注意后 4 种状态是 Spring MVC 中的值,在普通的 Spring 项⽬中只有前两种.
singleton
- 官⽅说明:(Default) Scopes a single bean definition to a single object instance for each Spring IoC container.
- 描述:该作⽤域下的Bean在IoC容器中只存在⼀个实例:获取Bean(即通过applicationContext.getBean等⽅法获取)及装配Bean(即通过@Autowired注⼊)都是同⼀个对 象。
- 场景:通常⽆状态的Bean使⽤该作⽤域。⽆状态表示Bean对象的属性状态不需要更新 备注:Spring默认选择该作⽤域
prototype
- 官⽅说明:Scopes a single bean definition to any number of object instances.
- 描述:每次对该作⽤域下的Bean的请求都会创建新的实例:获取Bean(即通过applicationContext.getBean等⽅法获取)及装配 Bean(即通过@Autowired注⼊)都是新的对象实例。
- 场景:通常有状态的Bean使⽤该作⽤域
request
- 官⽅说明:Scopes a single bean definition to the lifecycle of a single HTTP request. That is, each HTTP request has its own instance of a bean created off the back of a single bean definition. Only valid in the context of a web-aware Spring ApplicationContext.
- 描述:每次http请求会创建新的Bean实例,类似于prototype
- 场景:⼀次http的请求和响应的共享Bean
- 备注:限定SpringMVC中使⽤
session
- 官⽅说明:Scopes a single bean definition to the lifecycle of an HTTP Session. Only valid in the context of a web-aware Spring ApplicationContext.
- 描述:在⼀个http session中,定义⼀个Bean实例
- 场景:⽤户回话的共享Bean, ⽐如:记录⼀个⽤户的登陆信息
- 备注:限定SpringMVC中使⽤
2. 设置作用域
使⽤ @Scope 标签就可以⽤来声明 Bean 的作⽤域,⽐如设置 Bean 的作⽤域,如下代码所示:
package com.java.demo.enity;import org.springframework.beans.factory.config.ConfigurableBeanFactory;
import org.springframework.context.annotation.Bean;
import org.springframework.context.annotation.Scope;
import org.springframework.stereotype.Controller;@Controller
public class Users {//使用@Scope声明Bean作用域@Scope(ConfigurableBeanFactory.SCOPE_PROTOTYPE)@Beanpublic User user1(){User user = new User();user.setId(1);user.setName("xxxflower");return user;}
}
运行结果:
我们可以看到,在使用prototype时运行结果与预期结果相同.
关于@Scope的写法有两种:
- 直接设置值:
@Scope("prototype") - 使⽤枚举设置:
@Scope(ConfigurableBeanFactory.SCOPE_PROTOTYPE)
三. Spring 执行流程和 Bean 的生命周期
1. Spring 执行流程
- 在main方法中遇到
Application时启动spring容器。 - 此时根据容器设置的配置文件去找相应配置文件。
- 如果存在basepackage 。此时去循环查看basepackage中是否有五大类注解。
- 如果有五大类注解,此时进行初始化和属性依赖的赋值。
- 操作spring依赖 读修改 书写业务
- 关闭容器 释放资源
图解:
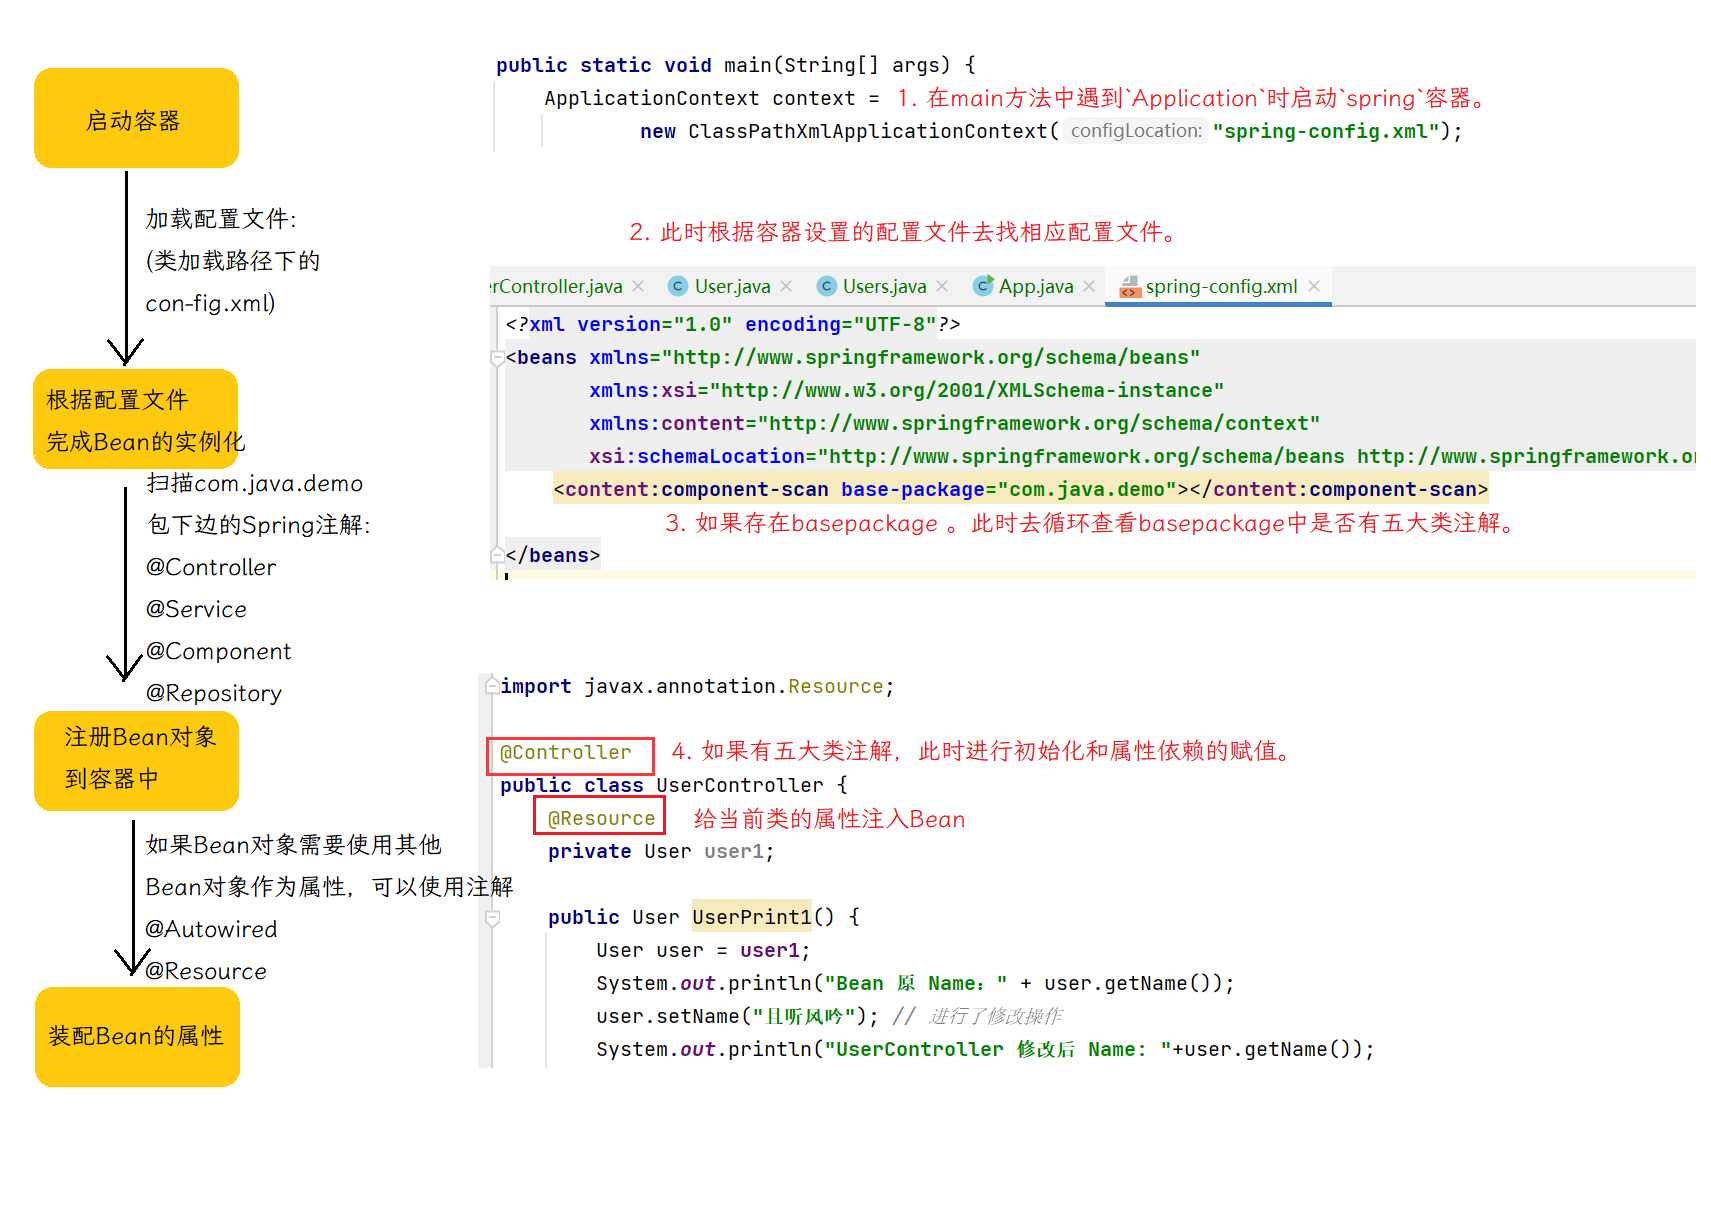
Bean 执⾏流程(Spring 执⾏流程):启动 Spring 容器 -> 实例化 Bean(分配内存空间,从⽆到
有) -> Bean 注册到 Spring 中(存操作) -> 将 Bean 装配到需要的类中(取操作)。
2. Bean生命周期
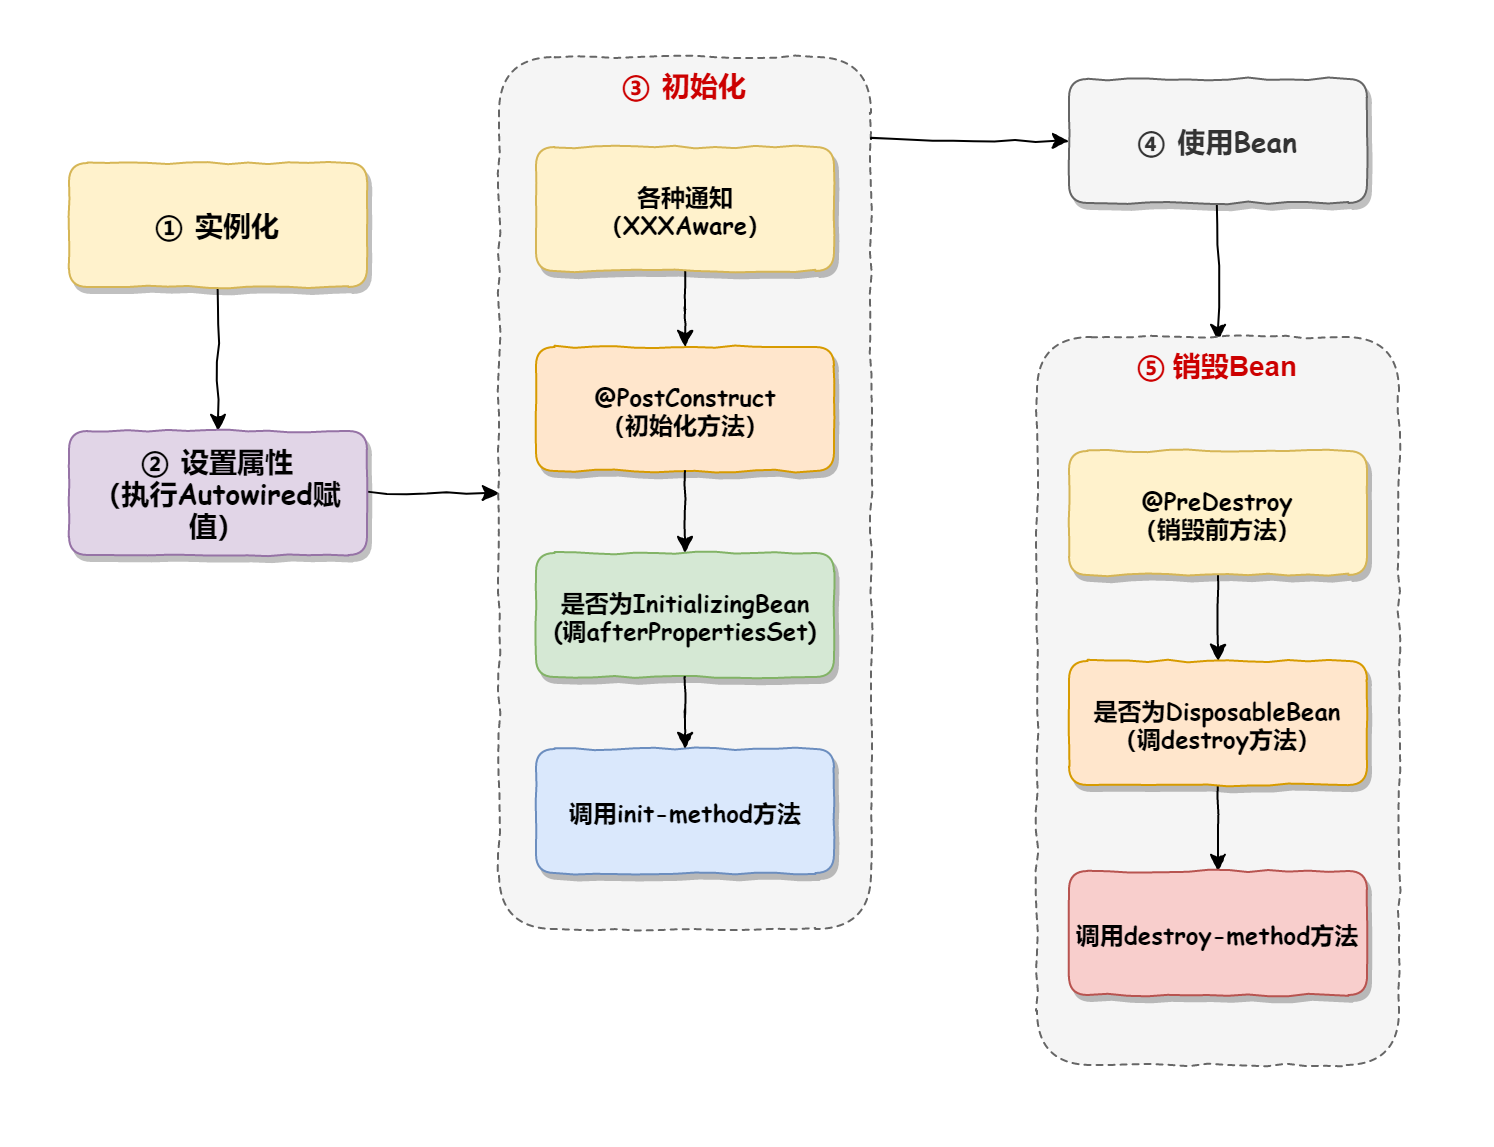
Bean 的生命周期是指一个 Bean 在被创建、初始化、使用和销毁的整个过程。
Bean 生命周期(从诞生到销毁过程):
- 开辟内存空间:实例化≠初始化
- 设置属性(注入属性)
- 初始化
3.1 各种通知
3.2 初始化前置方法
3.3 初始化方法【两种实现方式: xml 方式、注解方式】
3.4 初始化后置方法 - 使用 Bean
- 销毁Bean对象
销毁容器的各种⽅法,如 @PreDestroy、DisposableBean 接⼝⽅法、destroy-method。
注意:一定是先设置属性,再初始化.因为初始化的时候可能用到属性的内容.
生命周期演示:
首先,我们创建一个名为 ExampleBean 的 Java 类,实现了 Spring 的 InitializingBean 和 DisposableBean 接口,这两个接口提供了在 Bean 初始化和销毁时的回调方法。
import org.springframework.beans.factory.DisposableBean;
import org.springframework.beans.factory.InitializingBean;public class ExampleBean implements InitializingBean, DisposableBean {public ExampleBean() {System.out.println("ExampleBean 构造函数");}@Overridepublic void afterPropertiesSet() throws Exception {System.out.println("ExampleBean 初始化方法");}public void doSomething() {System.out.println("ExampleBean 执行业务逻辑");}@Overridepublic void destroy() throws Exception {System.out.println("ExampleBean 销毁方法");}
}
然后,在 Spring 的配置文件中声明该 Bean,并将其注入到其他类中使用:
<?xml version="1.0" encoding="UTF-8"?>
<beans xmlns="http://www.springframework.org/schema/beans"xmlns:xsi="http://www.w3.org/2001/XMLSchema-instance"xmlns:content="http://www.springframework.org/schema/context"xsi:schemaLocation="http://www.springframework.org/schema/beans http://www.springframework.org/schema/beans/spring-beans.xsd http://www.springframework.org/schema/context https://www.springframework.org/schema/context/spring-context.xsd"><content:component-scan base-package="com.java.demo"></content:component-scan><bean id="exampleBean" class="com.java.demo.ExampleBean" scope="singleton" init-method="afterPropertiesSet" destroy-method="destroy"/></beans>
在上述配置中,我们将 ExampleBean 声明为一个 singleton 的 Bean,并指定了初始化方法为 afterPropertiesSet,销毁方法为 destroy。
接下来,我们创建一个简单的测试类 ExampleApp 来使用 ExampleBean:
package com.java.demo;import org.springframework.context.ApplicationContext;
import org.springframework.context.support.ClassPathXmlApplicationContext;public class ExampleApp {public static void main(String[] args) {// 加载 Spring 的配置文件ApplicationContext context = new ClassPathXmlApplicationContext("spring-config.xml");// 获取 ExampleBean 实例ExampleBean exampleBean =context.getBean("exampleBean",ExampleBean.class);// 执行业务逻辑exampleBean.doSomething();// 关闭 Spring 容器,触发 Bean 的销毁方法try {exampleBean.destroy();} catch (Exception e) {e.printStackTrace();}}
}
运行 ExampleApp 类,结果如下:
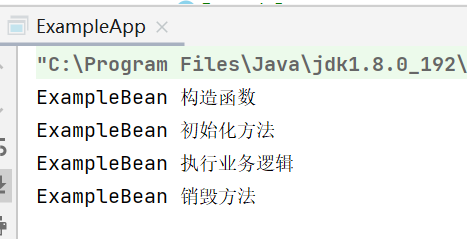
需要注意的是,Bean 的生命周期可以进一步通过添加自定义的初始化和销毁方法来扩展。可以使用 @PostConstruct 和 @PreDestroy 注解,或者在 Spring 配置文件中通过 init-method 和 destroy-method 属性来指定自定义的初始化和销毁方法。